Product Details
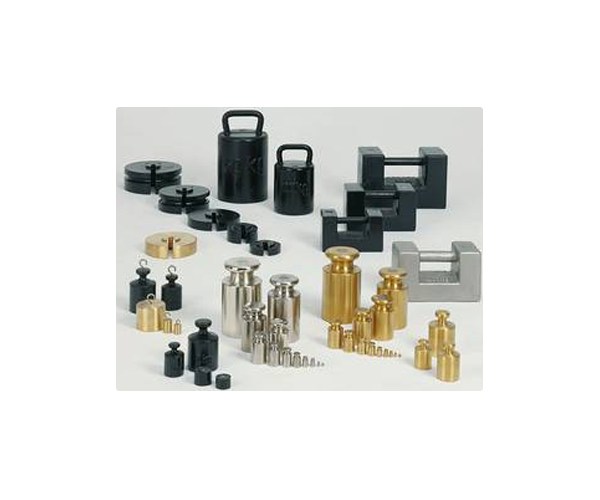
Product Name:Precision Weights and Commercial Weights
Description
Precision weights of class M1:
Adjustment, testing and calibration instrument for commercial scales (class III) and for quality assurance in accordance with DIN EN ISO 9001ff for scales with fewer than 30,000 steps.
- Weights for use in the calibration and official calibration of weights of classes M2 and M3.
Precision weights of class M2:
Adjustment, testing and calibration instrument for commercial scales (class II) and for quality assurance in accordance with DIN EN ISO 9001ff for scales with fewer than 10,000 steps.
- Use in general business and together with commercial scales (class III).
- Weights for use in the calibration and official calibration of weights of class M3.
Commercial weights of class M3:
Adjustment, testing and calibration instrument for industrial scales (class IIII) and for quality assurance in accordance with DIN EN ISO 9001ff for scales with fewer than 3,000 steps.
Weights for use with
- Commercial scales (class III) and industrial scales (class IIII).
- Learning materials for schools and training.
- Load tests in elevator, crane and vehicle construction.
All 3 classes depending on precision requirement as load cells for pull, pressure and torsion requirements.
Marking in accordance with OIML R111:2004
![]()
Weights from 1g to 500g are marked with their nominal value and the unit symbol ‘g’ (e.g. ’10 g’).
Weights from 1kg and greater are marked with their nominal value and the unit symbol ‘kg’ (e.g. ‘1 kg’).
Additional marking of class:
- Class M1: ‘M’ or ‘M1’
- Class M2: ‘M2’
- Class M3: ‘M3’ or ‘X’
On the upper side.
Weights in accordance with DIN 1924 are not marked with their class.
The manufacturer’s symbol may be added on rectangular block weights of class M1 and all weights of classes M2 and M3.
In order to differentiate between them multiple weights with the name nominal value in sets are marked with dots or stars.
It is also possible to add up to 5 user properties (symbols, letters and numbers) in order to clearly identify the weights as test or measurement tools. These user properties can be determined by the client when he places the order.


